Windows Connection Manager – Installer
Cloudhouse Guardian (Guardian) provides two methods for installing the Windows Connection Manager. The following topic describes how to download, install, and register the Connection Manager via the default Windows installer. Alternatively, you can install the Connection Manager via Command Line, see Windows Connection Manager – Command Line Installation for more information.
System Requirements
To install the Windows Connection Manager, the following system requirements must be met:
|
Requirement |
Description |
|---|---|
| Microsoft Windows Virtual Machine | Recommended specifications: Windows Server 2012 (or later), 8GB RAM, 4 cores. |
| Microsoft .NET Framework | Version 4.5.2 (or above). |
| Microsoft Visual C++ 2015 Redistributable Package |
For Windows Connection Manager v4.19.0 (and above). Package download link provided on the Guardian Downloads page. |
| PowerShell (Windows Management Framework) |
Version 3 (or above). Installed on both the Connection Manager and the target nodes. |
| WinRM | Enabled in your Guardian environment. For more information, see Enable WinRM via Group Policy. |
| Port 443 | Must be able to reach the Guardian instance over this port. |
| Port 5985/5986 |
Must be able to reach Windows nodes over this port. Note: This is the default port. If you are using a different port, make sure that the Connection Manager can reach the port that the administrator is using to run their WinRM server. |
Note: If you do not meet any of the requirements described above, please contact your Cloudhouse Representative for assistance.
Acceptance Criteria
To install the Windows Connection Manager, the following acceptance criteria must be met:
|
Criteria |
Description |
|---|---|
| Operating System | Windows. For more information, see Supported Devices. |
| Connection Protocol | WinRM or remote PowerShell configured on all target nodes. |
| Windows Service User |
Service account set up and configured to use WinRM. The account should be a local administrator on the target nodes, or a domain administrator. |
| Connection Manager Group | A Windows Connection Manager group is required to add the Connection Manager to. Specifically, using the Group API Key. |
Deployment
The following procedure describes how to deploy your Windows Connection Manager. By default, this Connection Manager is distributed as an .exe file. First, you are required to download the package from the Guardian Application Downloads page, install the virtual machine via the Windows Installer, and then configure the Connection Manager service to run as a service user.
Download
-
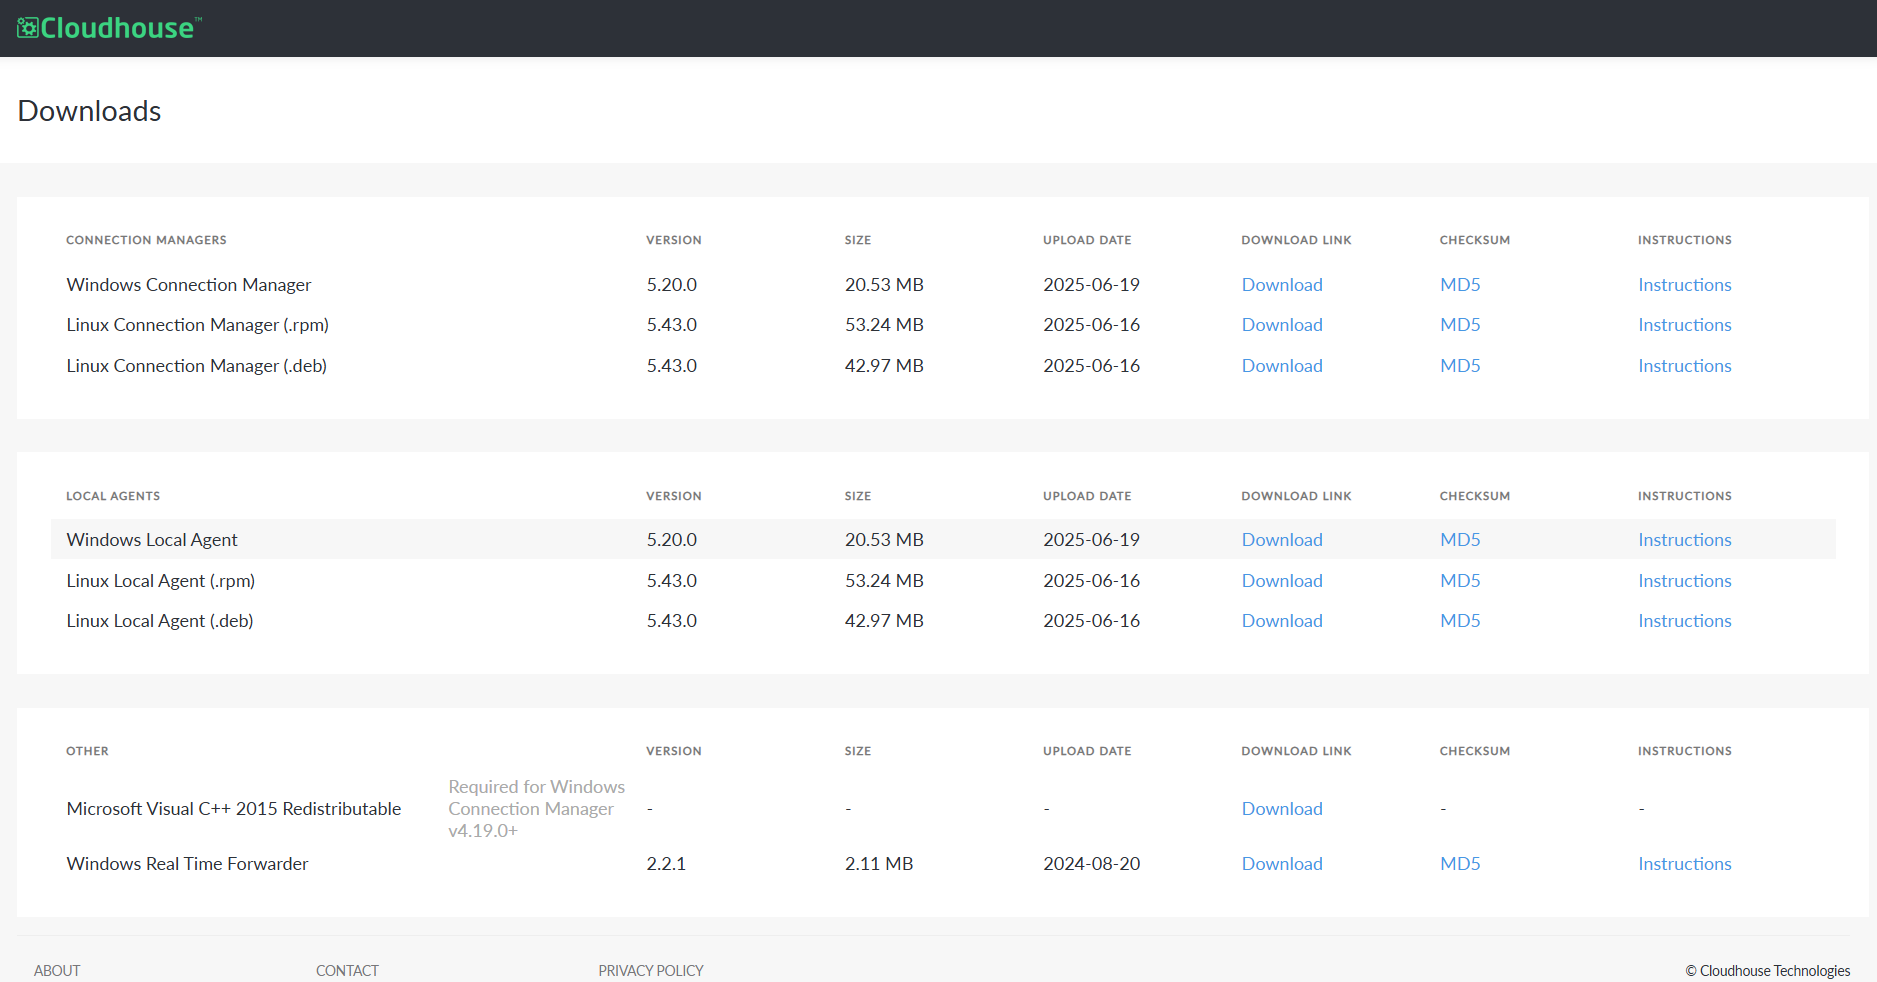
Access the Guardian Application Downloads page. Here, the Connection Manager is available to download as an .exe file.
-
In the Connection Managers panel, click the Download Link for the 'Windows Connection Manager'.
If your environment contains more than 100 nodes, you may require multiple Connection Managers, depending on the node type and region. For more information, please contact your Cloudhouse Representative and they will assist you with capacity planning.
Install
-
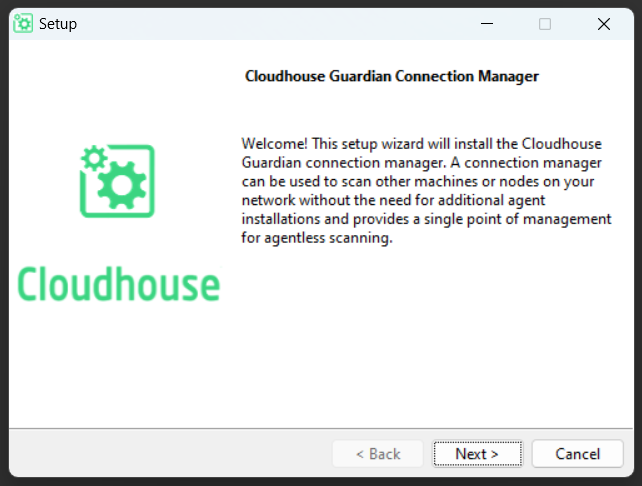
The Cloudhouse Guardian Connection Manager dialog is displayed. Click Next to begin the installation process. The License Agreement screen is displayed.
-
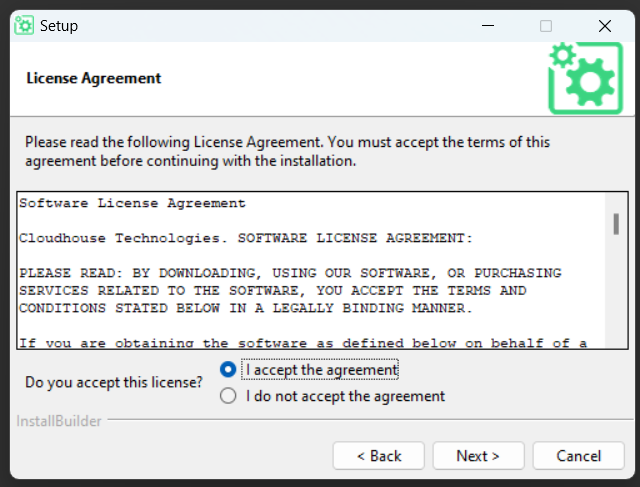
After reading the Software License Agreement, select the ‘I accept the agreement’ radio button box and click Next to proceed. The Installation Directory screen is displayed.
-
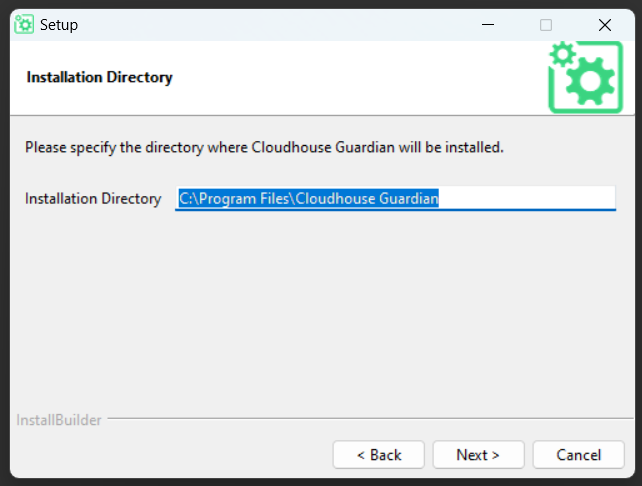
Enter the location you want the Connection Manager to be installed in the Installation Directory field, then click Next. The Connection Manager Registration screen is displayed.
-
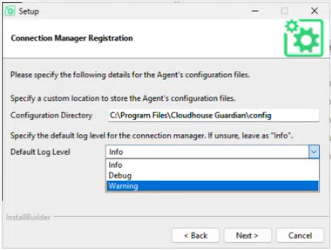
Enter the location you want the Connection Manager's configuration files to be stored in the Configuration Directory field, then select one of the following values from the Default Log Level drop-down list and click Next:
Note: The ability to configure the Default Log Level to provide more or less information was introduced in V5.20.0 of the Windows Agent as part of the June 2025 Monthly Release. Upgrade to this version or later to access this functionality.
-
'Info' (Default) – This is the recommended setting. Provides basic logging information.
-
'Debug' – Provides more detailed logging information.
-
'Warning' – Displays logs warnings only.
-
-
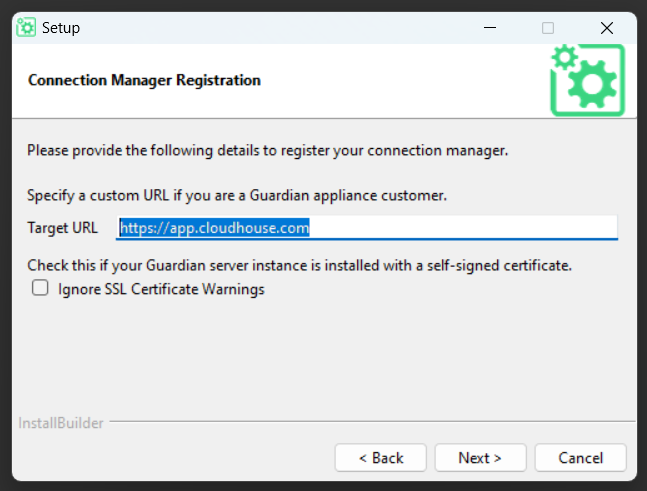
The following options are displayed, complete as required:
Here, the following options are displayed:
Note: If you are reinstalling or upgrading the Windows Connection Maanger, the fields displayed on this screen will vary to enable you to update your existing configuration. For more information on how to do this, see Update.
Option
Description
Target URL field The URL of your Guardian appliance or hosted instance, in 'https://' format.
Ignore SSL Certificate Warnings checkbox If selected, SSL certificate warnings are ignored. If your Guardian server instance is installed with a self-signed certificate, Cloudhouse recommend that you choose this setting.
-
Enter the Group API Key for the Connection Manager group you want to add the new Connection Manager to, then click Next. The Ready to Install screen is displayed.
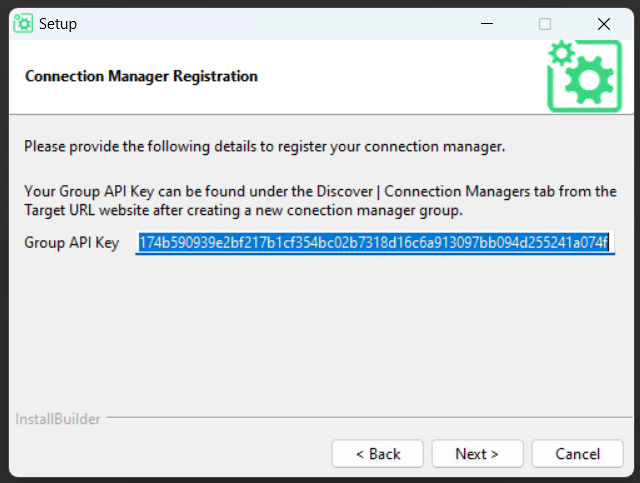
Note: For more information on how to source the Group API Key for an existing Connection Manager group, see Group API Key. Alternatively, to add a new Connection Manager group, see Add Connection Manager Group.
-
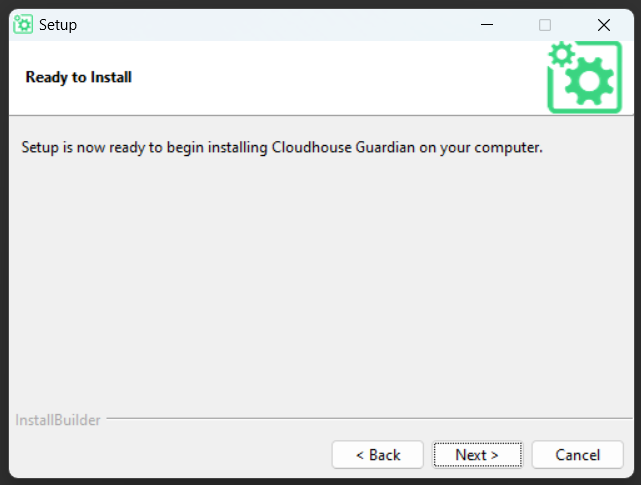
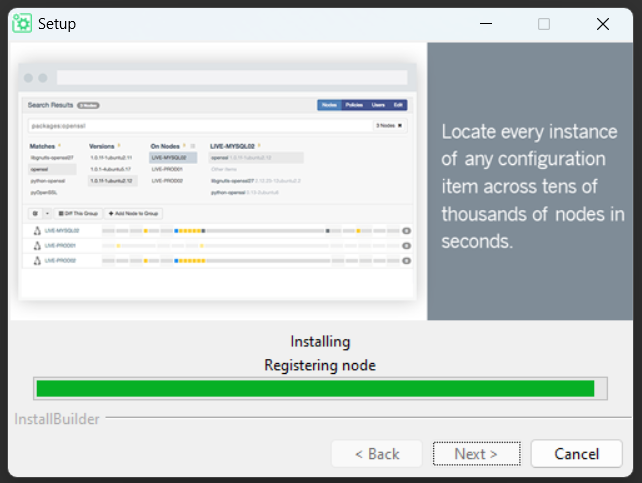
Click Next to begin installing the Connection Manager.
Note: If the Connection Manager Registration screen is displayed with an error message, see Registration Failed for more information on how to resolve the issue.
-
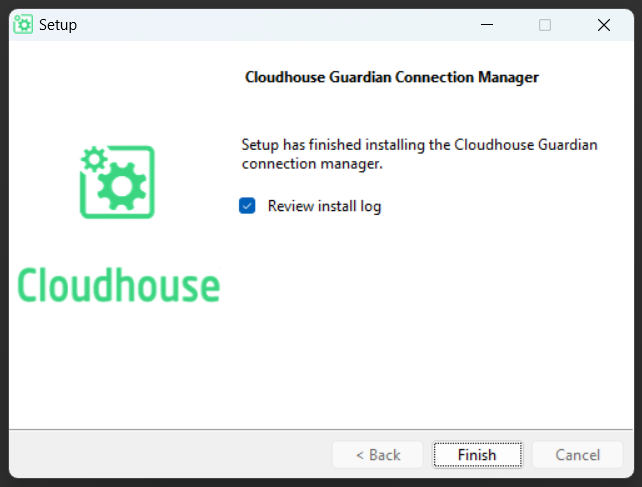
Once the installation is complete, click Next. The final Cloudhouse Guardian Connection Manager screen is displayed.
-
Click Finish to close the dialog.
If the correct values were set, the Connection Manager is installed and registered to your Guardian appliance. Optionally, you can check to see if the Connection Manager has been added to the specified Connection Manager group in your Guardian instance (
Configure
To begin scanning remote systems, you are required to provide the credentials for the user account that is configured to use WinRM for scanning. You can choose to provide them each time you add a node, or you can configure the Guardian service to run as a Windows service user, meaning that you only need to set them once. The following section describes how to configure the service, assuming that you already have a Windows service user configured with the correct permissions. For more information, see Acceptance Criteria.
-
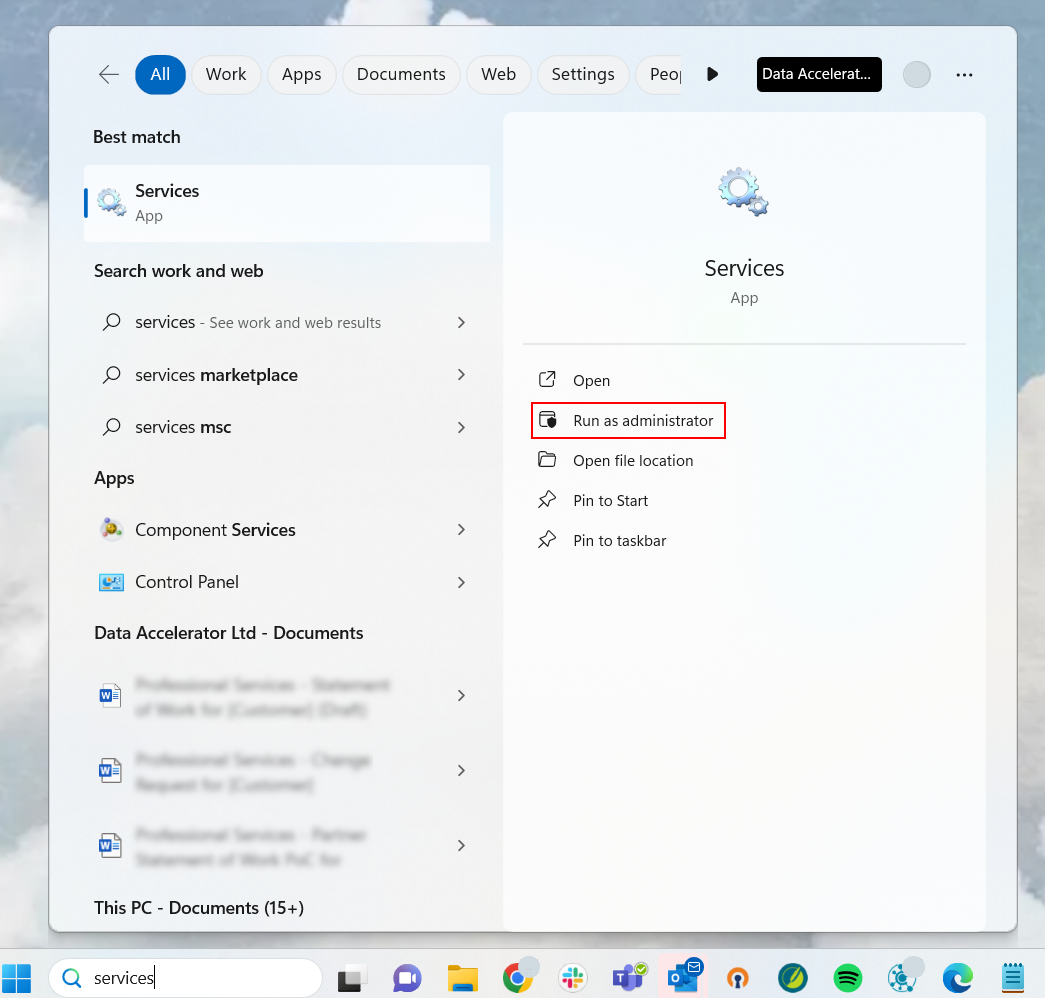
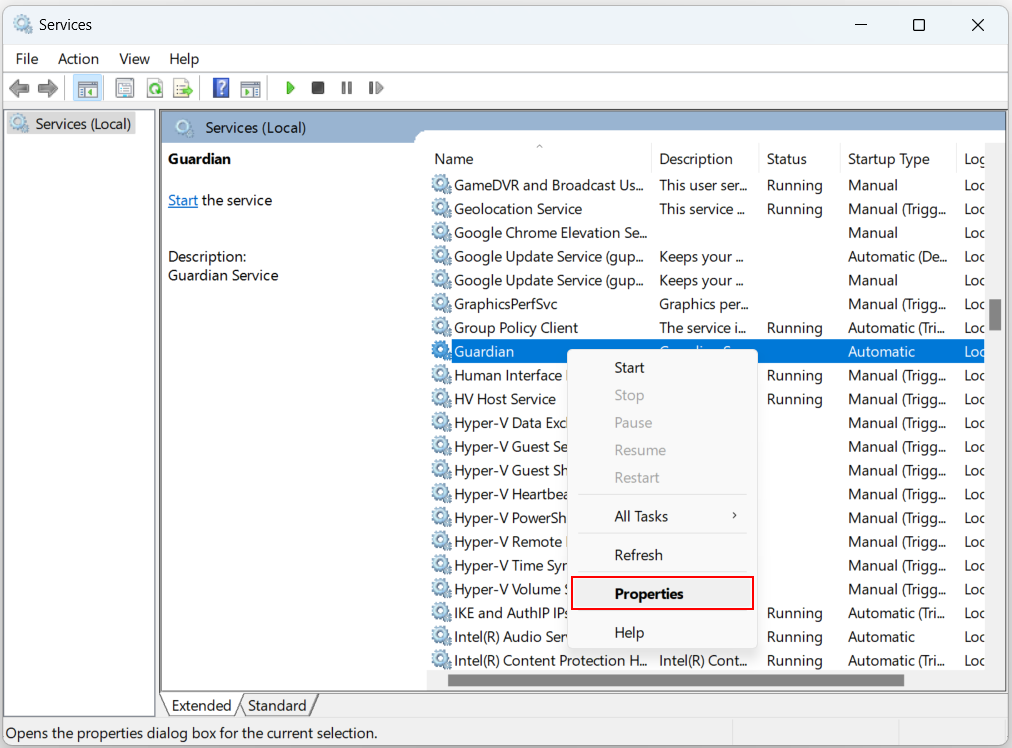
In the Windows Search box, type 'Services'. Then, click to Run as administrator. The Services dialog is displayed.
-
Locate the 'Guardian' service and check that the Status is set to 'Running'.
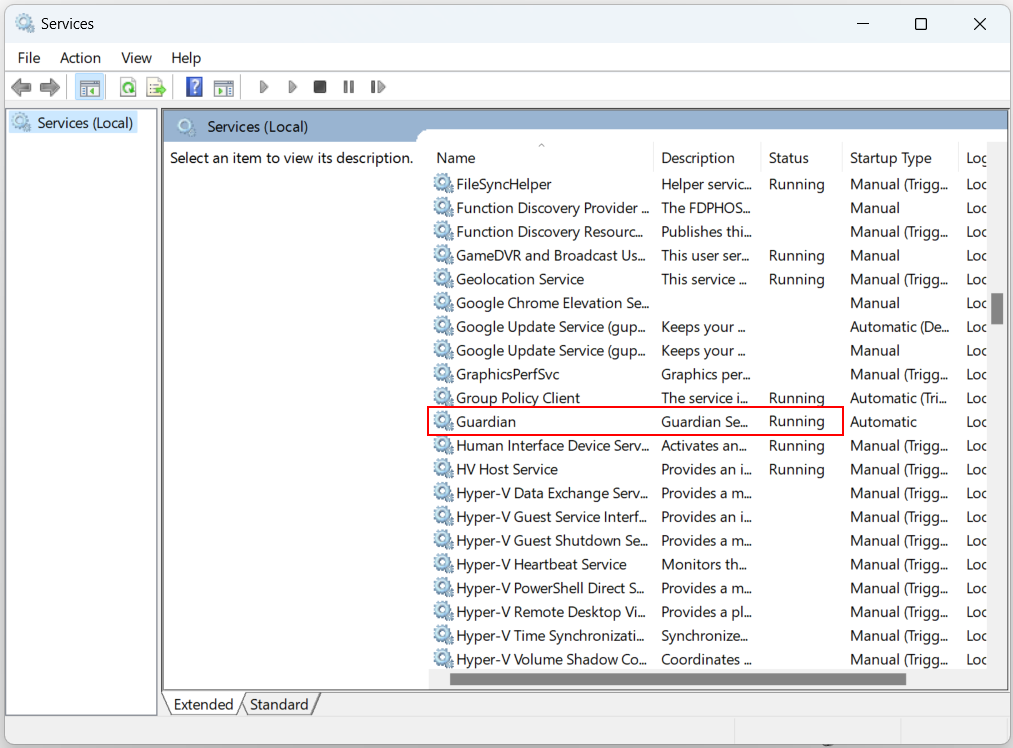
If the Status is set to 'Running', the Connection Manager has been installed successfully. If the 'Guardian' service is not displayed, the Connection Manager installation has failed, see Registration Failed for more information.
-
Right-click on the 'Guardian' service and select Properties. The Guardian Properties dialog is displayed.
-
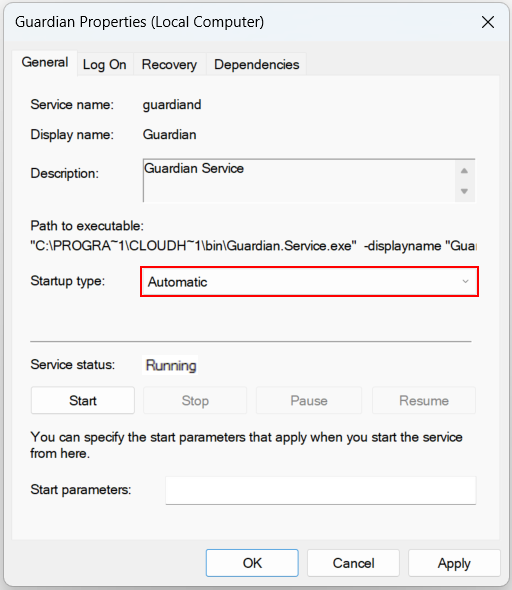
In the General tab, make sure that the Startup type is set to 'Automatic'.
-
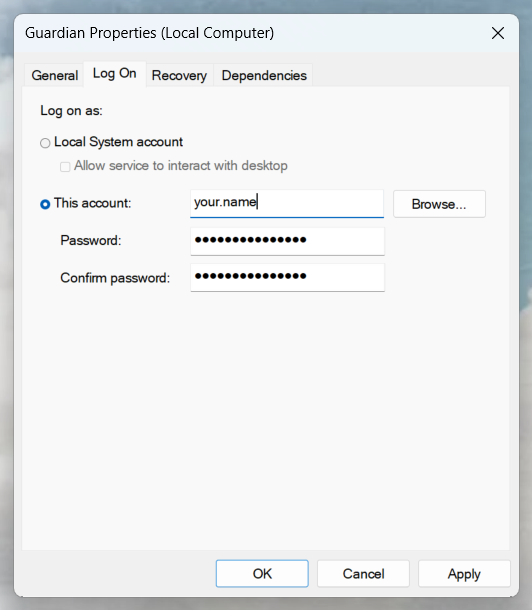
Then, in the Log On tab, select the This account radio button to display the following fields:
Field
Description
This account The name of the account holder.
Password Account password.
Confirm password Account password.
-
Enter the correct value in each of the fields and click Browse.
-
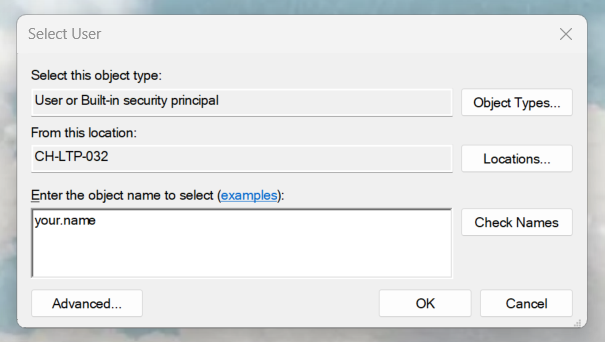
The Select User dialog is displayed, click Check Names to search your device for the Windows service user account.
Note: If no results are displayed when you enter the account information, you may not have a Windows service user account set up. Cloudhouse recommend asking your Guardian Representative for more information. If you are unable to create a Windows service user account with the correct permissions, contact your Cloudhouse Representative for assistance.
-
Select the Windows service user account and click OK to return to the Log On tab.
-
In the Log On tab, make sure that the Password and Confirm password fields are populated correctly. Then, click to Apply and OK to close the Guardian Properties dialog.
Finally, you need to restart the Guardian service to apply your changes. In the Services dialog, right-click on the 'Guardian' service and select Restart.
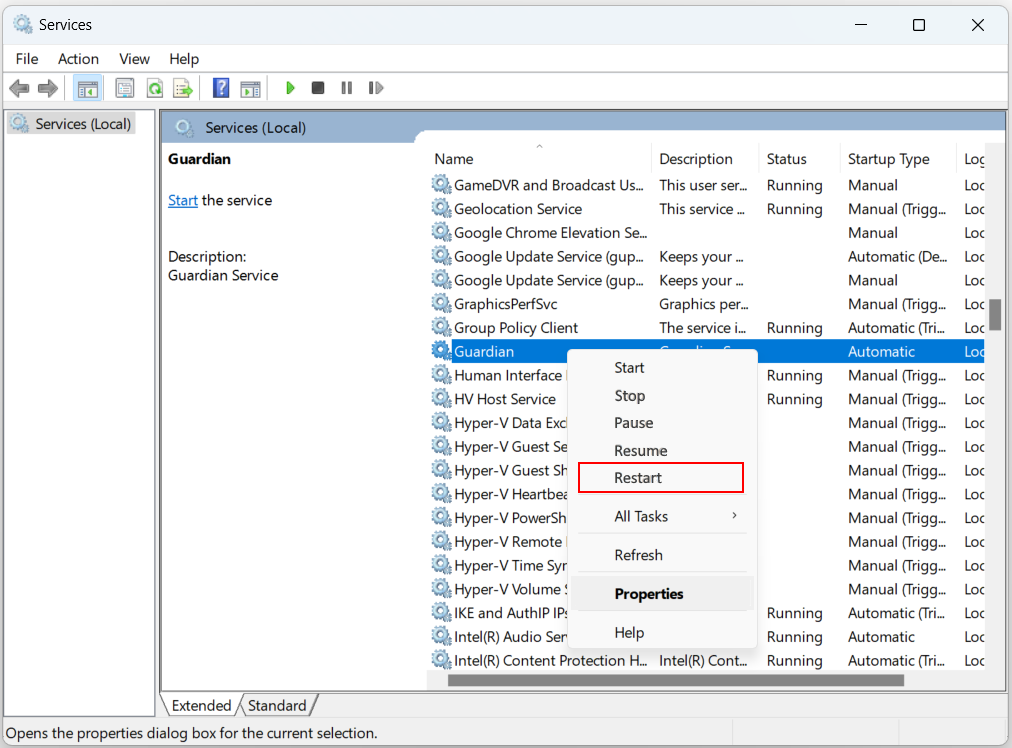
Once complete, the Connection Manager service is configured to run as a Windows service user. If the service user has the correct permissions, you are able to begin scanning nodes via the Connection Manager. For more information, see Add Nodes.
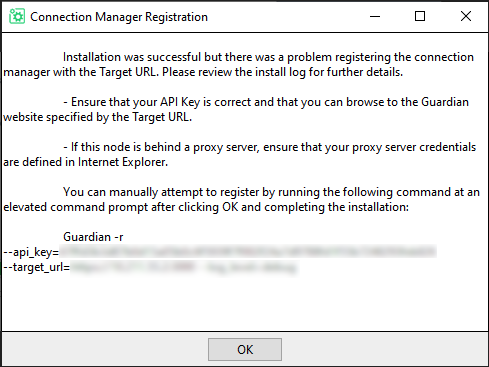
Registration Failed
After completing Step 1 - 8 of the Install procedure, if you received the following error message 'Installation was successful but there was a problem registering the Connection Manager with the Target URL. Please review the install log for further details', remediation is required to proceed with registering the Connection Manager to the Guardian appliance.
Install Log
First, Cloudhouse advise that you check the install log within the installation directory folder. By default, this is 'C:\Program Files\Cloudhouse Guardian'.
-
In the File Explorer, locate the installation directory for the Connection Manager.
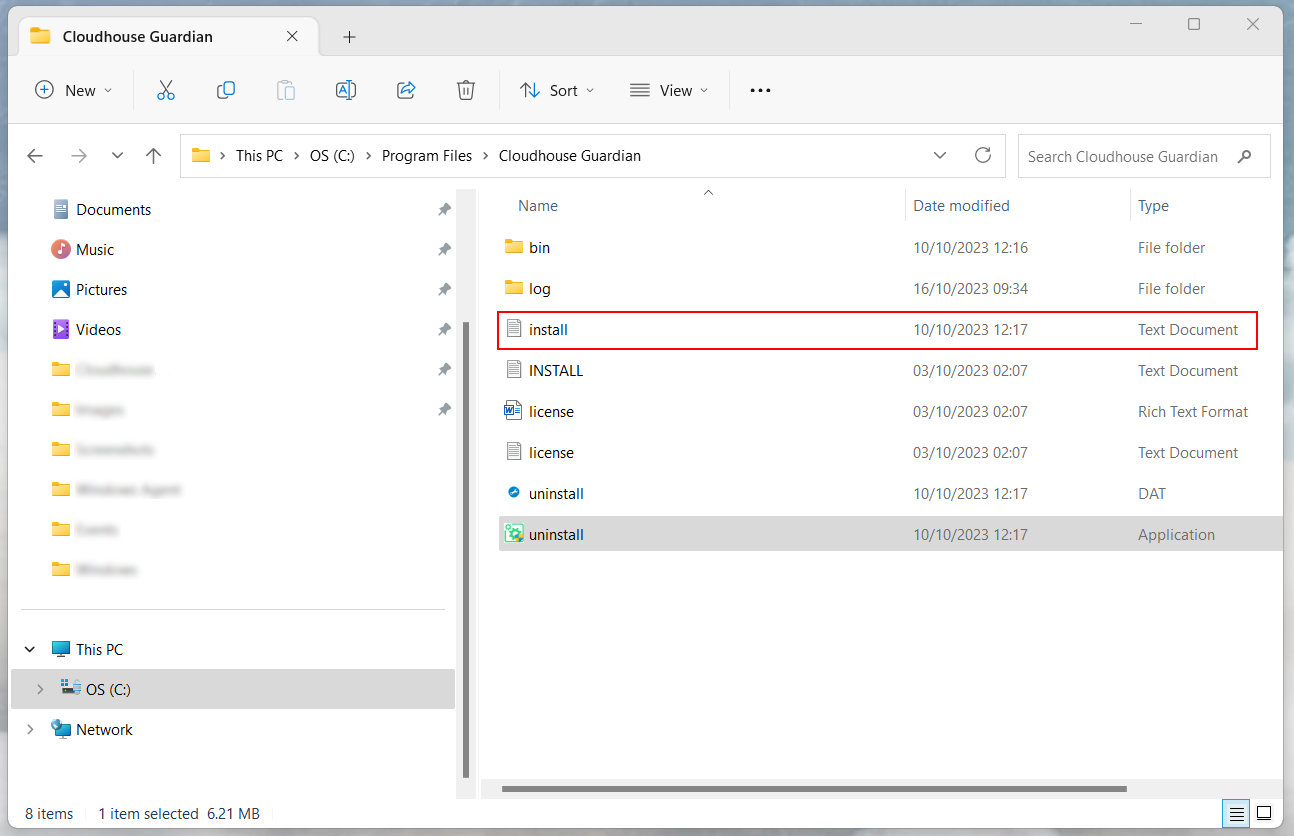
Here, the 'install' file is displayed.
-
Click to display the 'install' log and check what error messages are displayed. For more information on how to remediate these errors, see below.
Common Problems and Solutions
The following section describes the possible points of failure that may occur when attempting to register the Connection Manager to the Guardian appliance.
Ignore SSL Certificate Warnings
The most common failure is caused by an untrusted certificate being detected on the Guardian appliance. To resolve the issue, re-run the Cloudhouse Guardian Connection Manager installer and select the Ignore SSL Certificate Warnings checkbox.
Network and DNS
The second most common failure is caused by the network and/or DNS being configured incorrectly. Check if your Guardian instance is accessible from your browser on your Connection Manager host. If it is not accessible, check that the network and DNS is configured correctly and there are no firewall rules blocking the connection.
Group API Key
Another common failure is caused by the Group API Key being copied incorrectly from the desired Connection Manager group (Inventory > Connection Managers tab > Groups). To resolve the issue, re-run the Cloudhouse Guardian Connection Manager installer and provide the correct Group API Key.
Tip: If you do not want to re-run the Cloudhouse Guardian Connection Manager installer, you can install the Connection Manager via the Command Line instead. For more information, see Windows Connection Manager – Command Line Installation.
Post-Deployment
Once the Connection Manager has been deployed, you can update or uninstall it by following the procedures described below.
Update
To update the Windows Connection Manager, you can install a new version via the same process. The new version will be available to download from the Guardian Application Downloads page, labeled 'Windows Connection Manager'.
Note: Make sure that the correct service user account is signed in before restarting the 'Guardian' service.
When reinstalling or upgrading the Windows Agent, you can update the existing configuration of your API Key and Target URL via the Guardian Agent Installer.
To update the configuration of an existing Windows Agent, complete the following steps:
-
Complete steps 1 - 7 of the Install process described above. This will reinstall/upgrade your Windows Connection Manager to the newest version.
-
On the Existing Configuration Found screen, the following options are displayed:
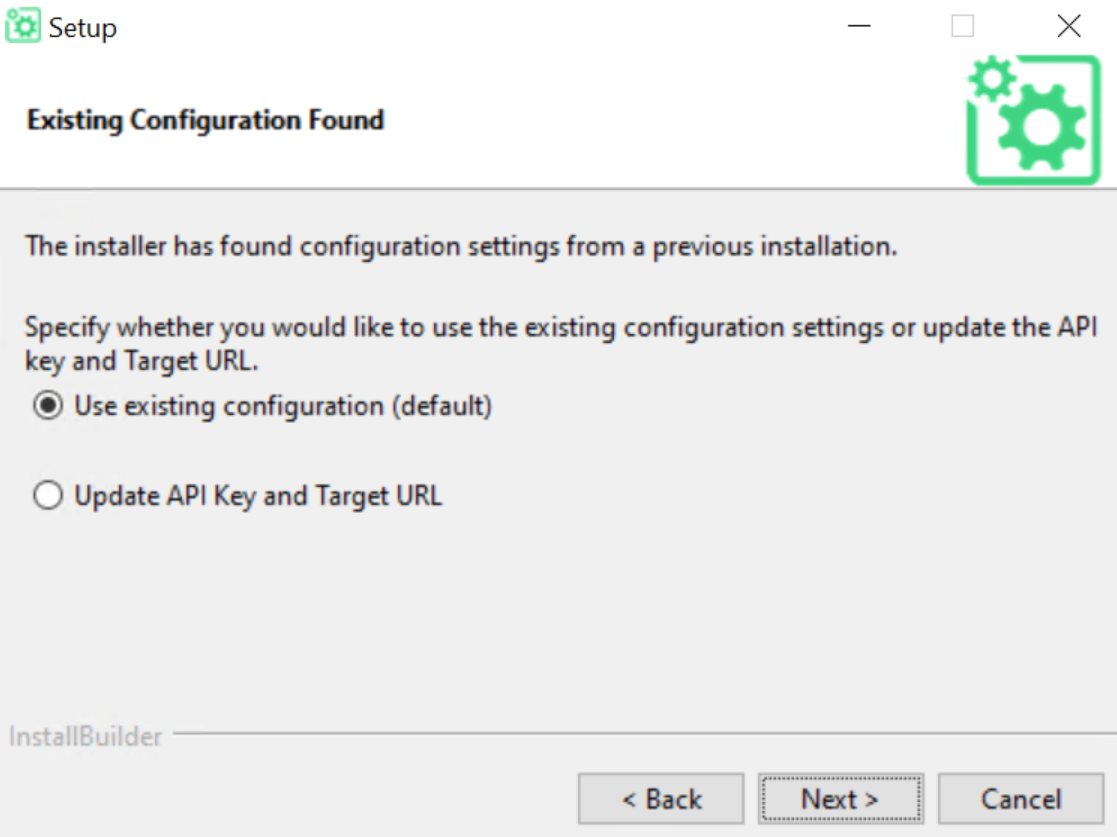
Option Description Use existing configuration radio button Option to use the existing API Key and Target URL registered to the Windows Agent. Update API Key and Target URL radio button Option to update the API Key and Target URL registered to the Windows Agent. If selected, the following fields are displayed:
-
API Key – Enter a new API Key in the field provided to register the Windows Agent to a new Connection Manager group.
-
Target URL field – Enter a new URL for your Guardian appliance or hosted instance, in 'https://' format.
-
-
Once you have completed the options on the Existing Configuration Found screen, click Next.
-
Continue the process of registering your Windows Agent to the Guardian appliance, as described in the Install section.
The Windows Agent is updated as expected. To confirm it is working, see Connect and Scan.
Uninstall
To uninstall the Windows Connection Manager, you can choose between two methods.
Control Panel
First, you can uninstall the Connection Manager via the Control Panel.
-
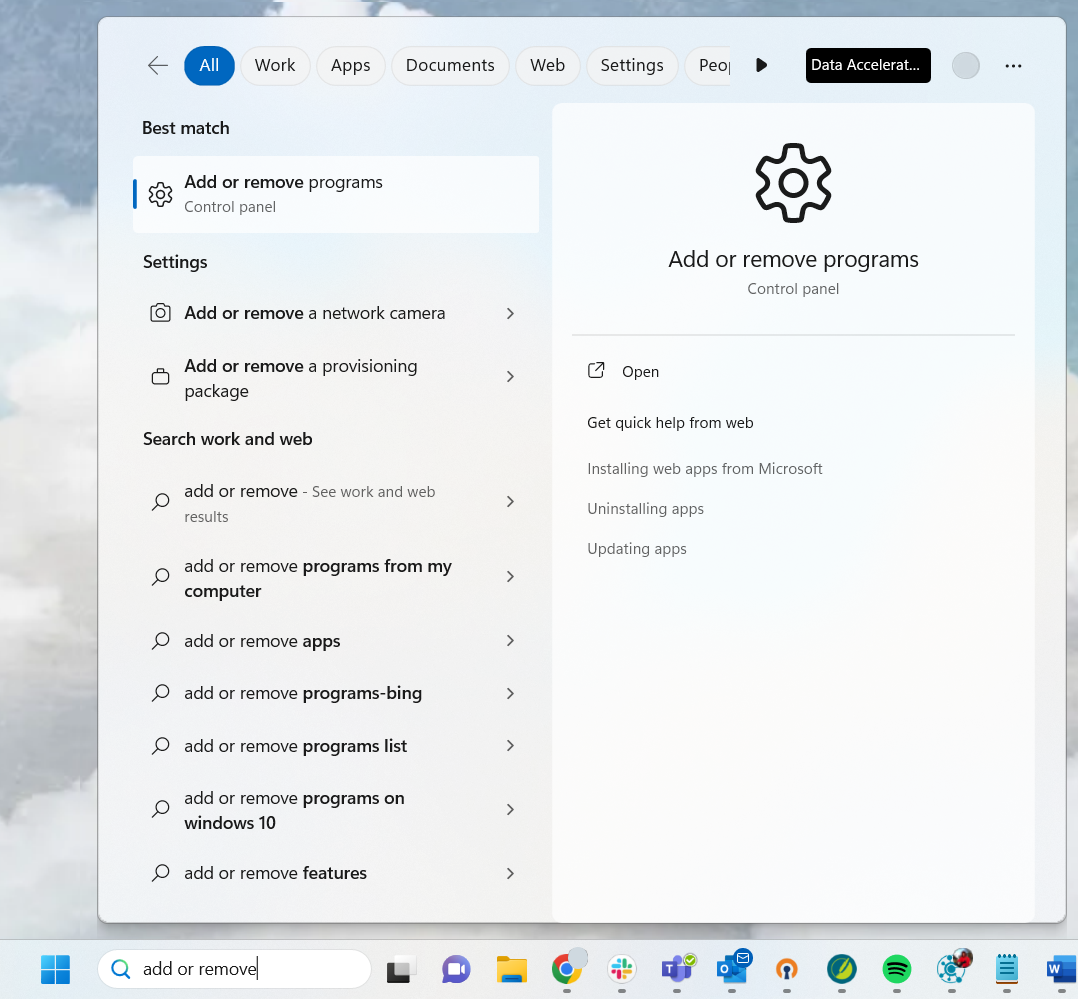
In the Windows Search box, type 'Add or remove programs'. Then, click to Open. The Installed apps dialog is displayed.
-
Locate the 'Cloudhouse Guardian' application. Then, click the Ellipsis (
 ) to display the drop-down list. Here, you can click to Uninstall the application.
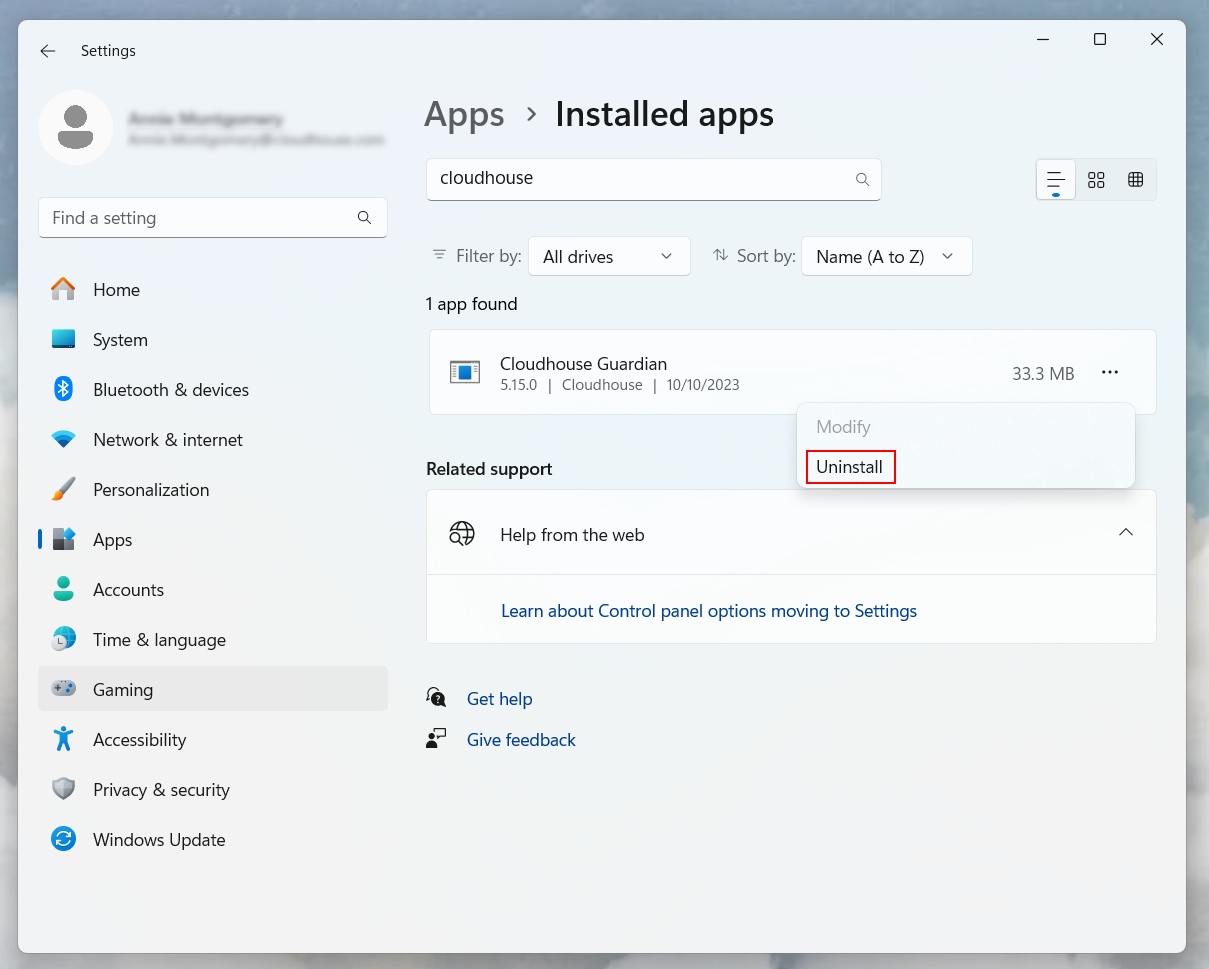
Guardian Uninstaller
Alternatively, you can uninstall the Connection Manager via the Guardian Uninstaller that is stored within the installation directory. By default, this is 'C:\Program Files\Cloudhouse Guardian'.
-
In the File Explorer, locate the installation directory for the Connection Manager.
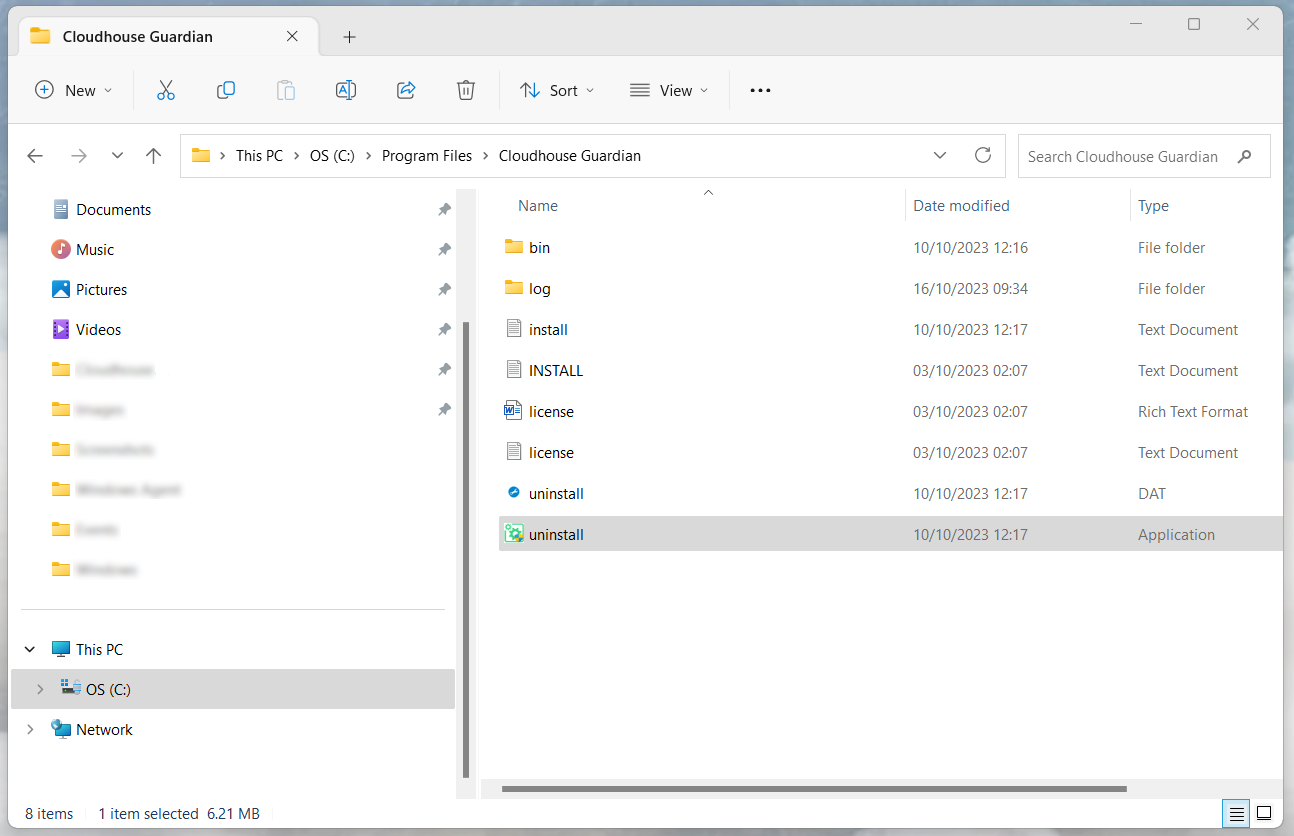
Here, the 'uninstall.exe' application is displayed.
-
Click to launch the uninstaller.
-
The User Account Control authentication dialog is displayed, click Yes to proceed with uninstalling the Connection Manager.